Recently I started playing with generative art. I'm new to the whole thing and I'm absolutely enjoying it. Today I want to show you the first generative art project I'm satisfied with.
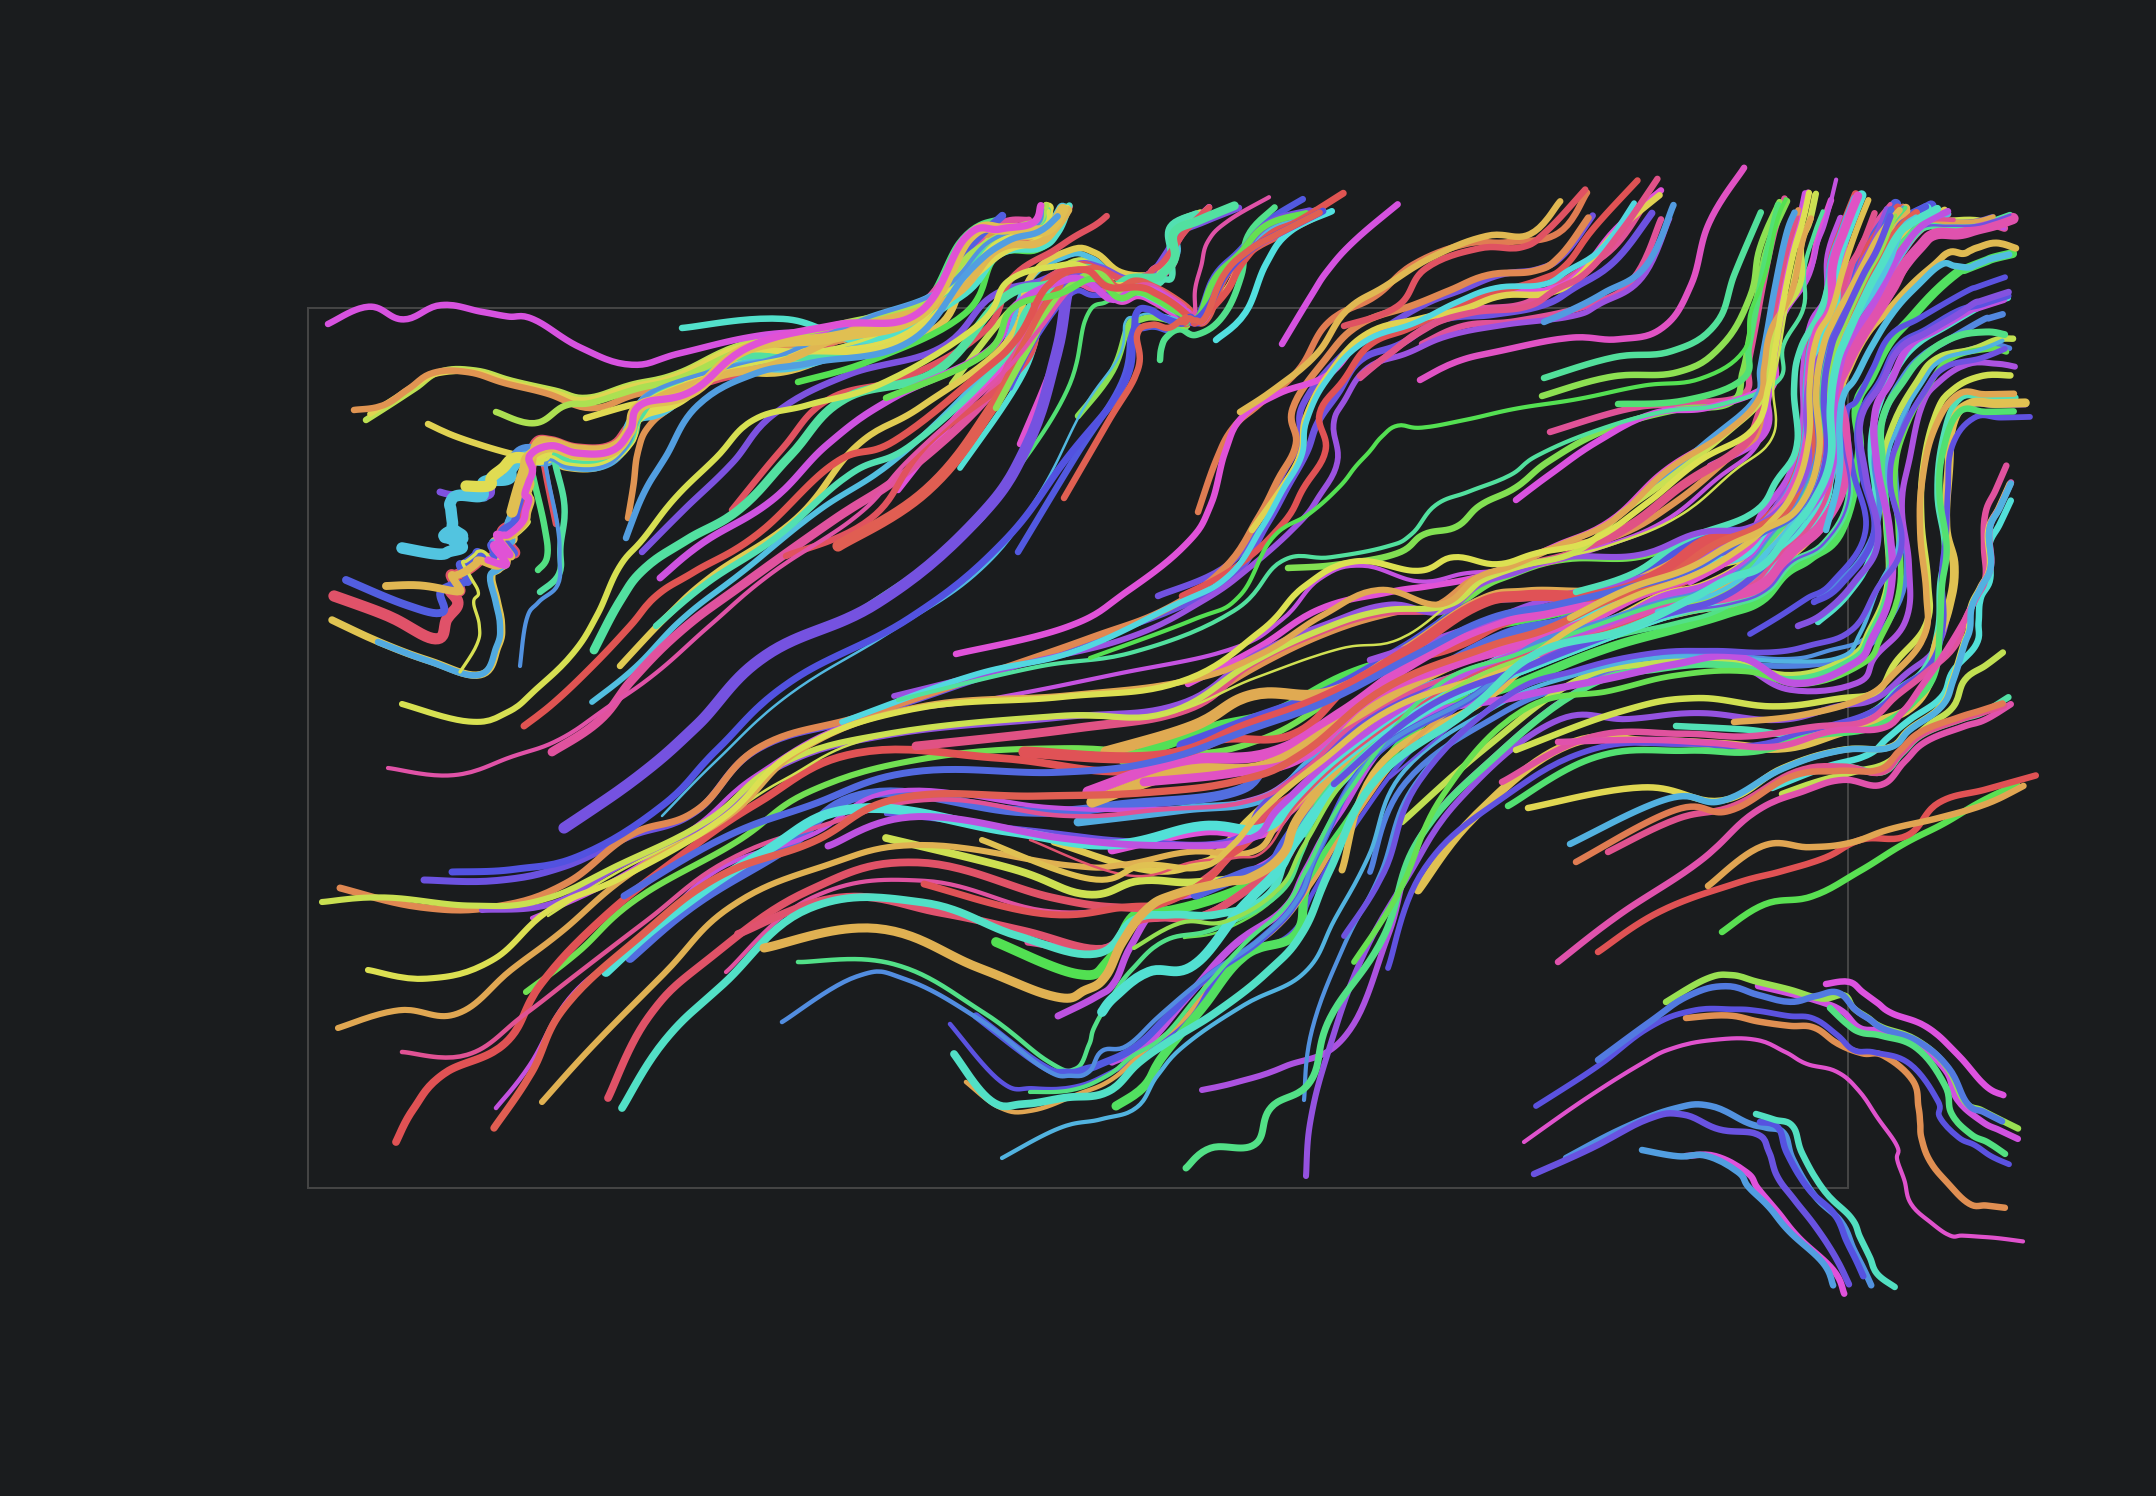
It is called Neon and you can check it out here or by clicking on the image below.
I will try to explain in detail how Neon works, however this won't be a coding tutorial. But it is an open source project, and code is available here.
My first attempts #
These were very simple and I was just exploring various concepts and tools:
I'm sharing these to show that my initial work was pretty humble. The point is - don't be afraid to experiment with things like this. For me, it was easier than I thought it would be, and I enjoyed every minute of it.
Vector fields #
After watching Vladimir's talk about his Aesthetic Engine 2, I started experimenting with vector fields.
This is an example of one randomly generated vector field:
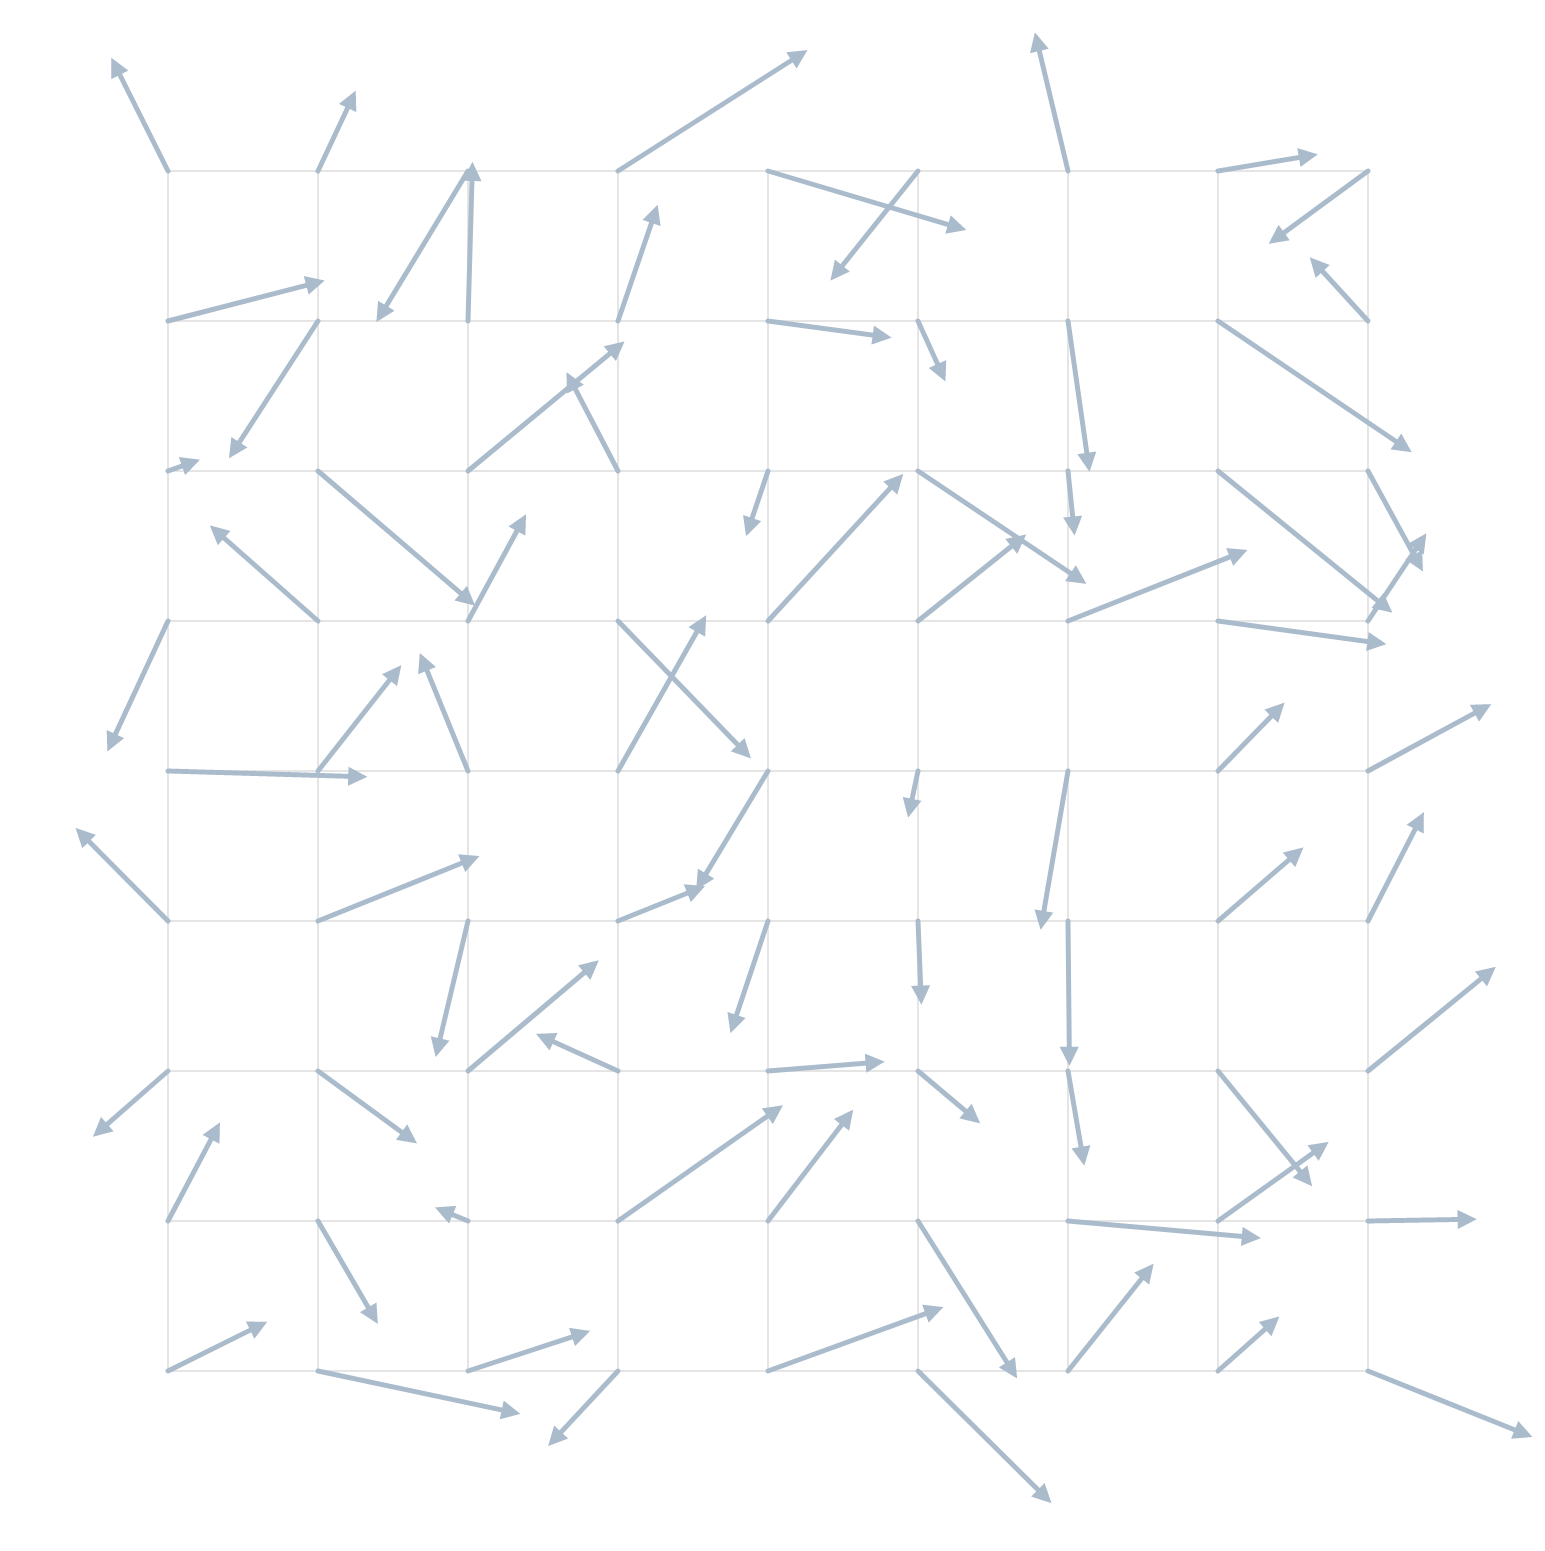
Think of it like it is an air or water flow. If this field was a river and you drop a leaf in it, these forces will take it and carry it around. If we plot the movement of the leaf, we'll get a line.
If we draw a lot of these lines, we will visualize the flow of the field. That is the core concept I used with Neon. But for a start let's see how can we draw a single line.
Drawing a line #
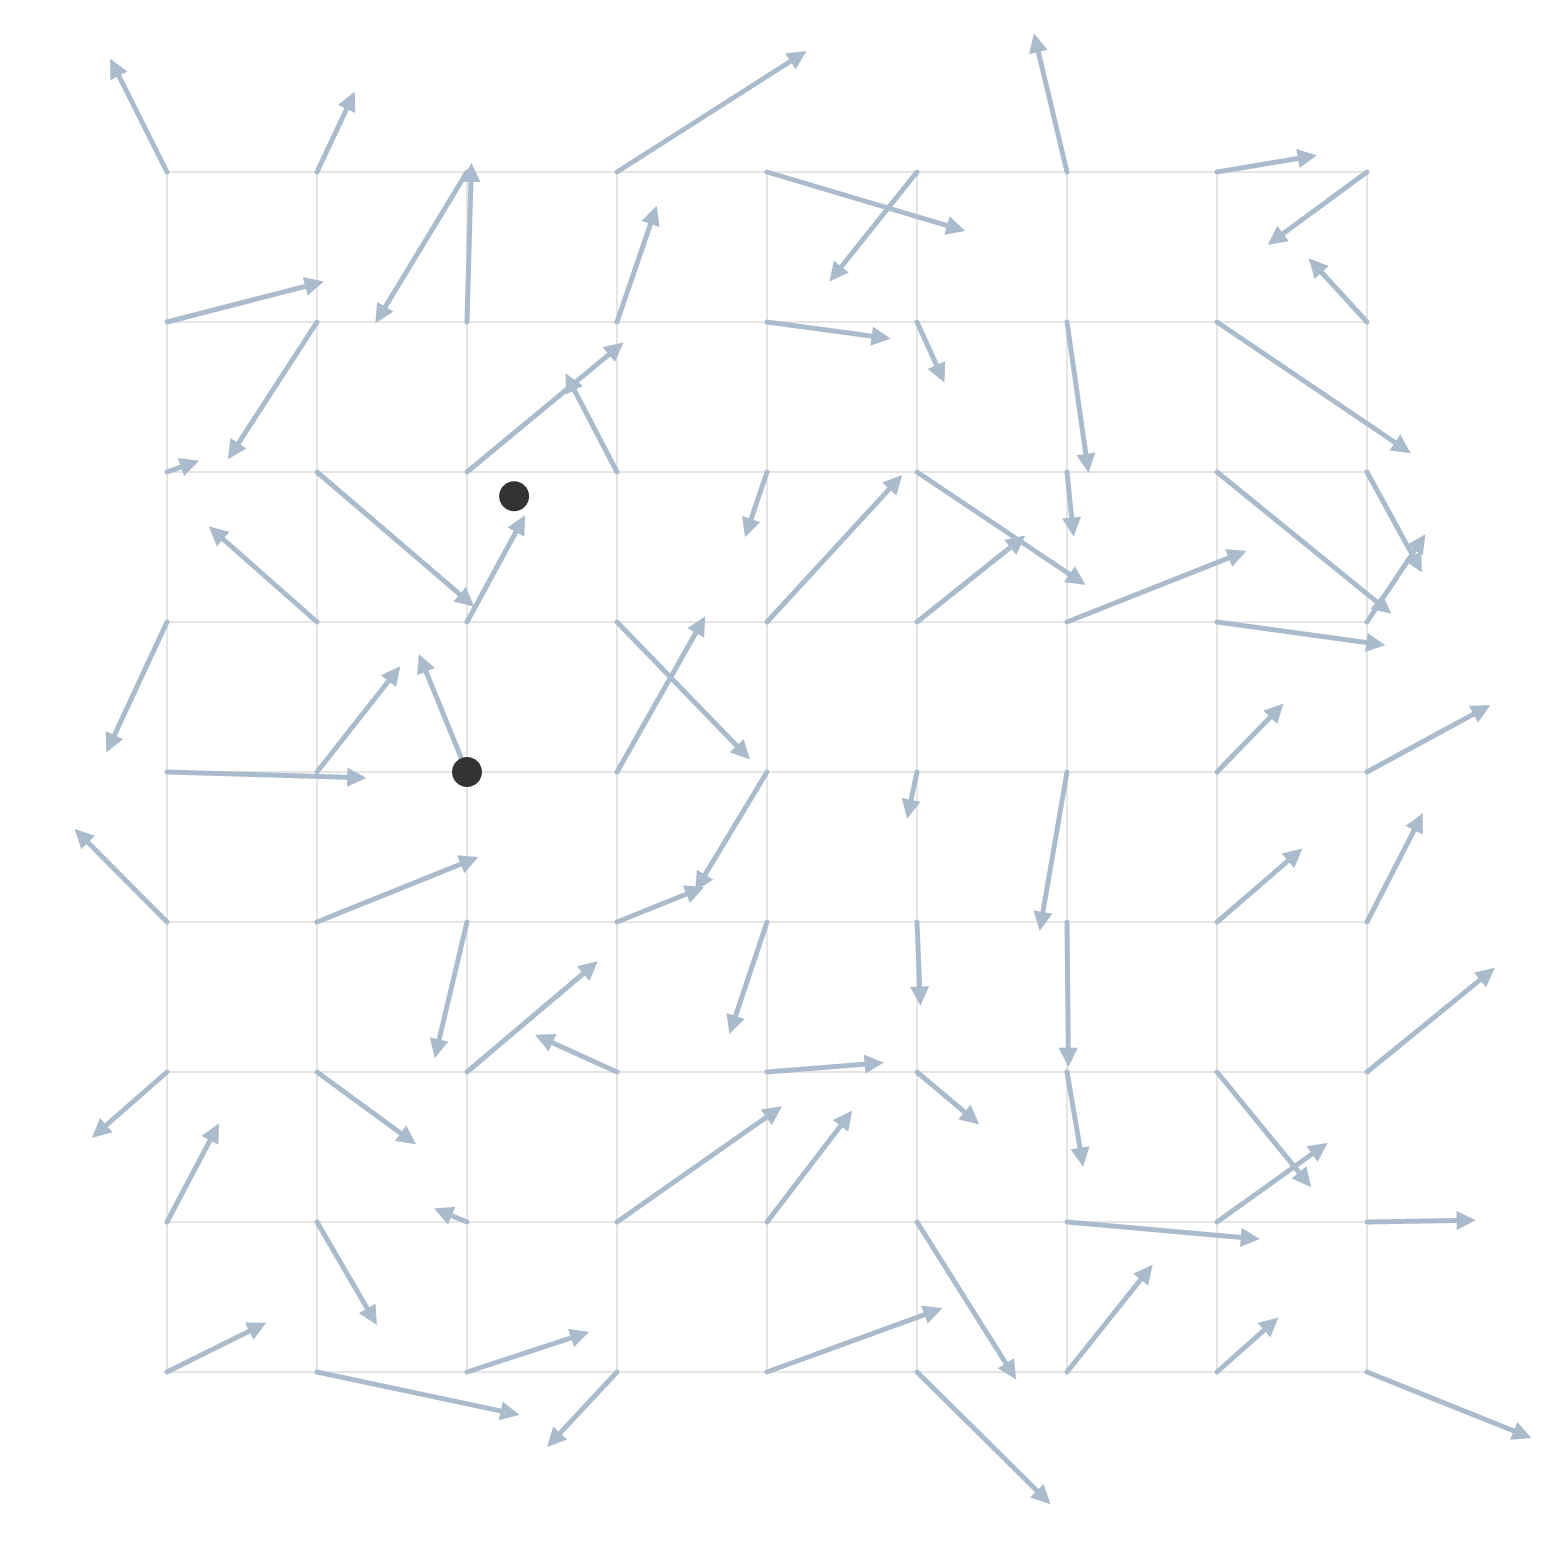
To draw a line, we'll select a random point for its start (we are dropping a leaf).
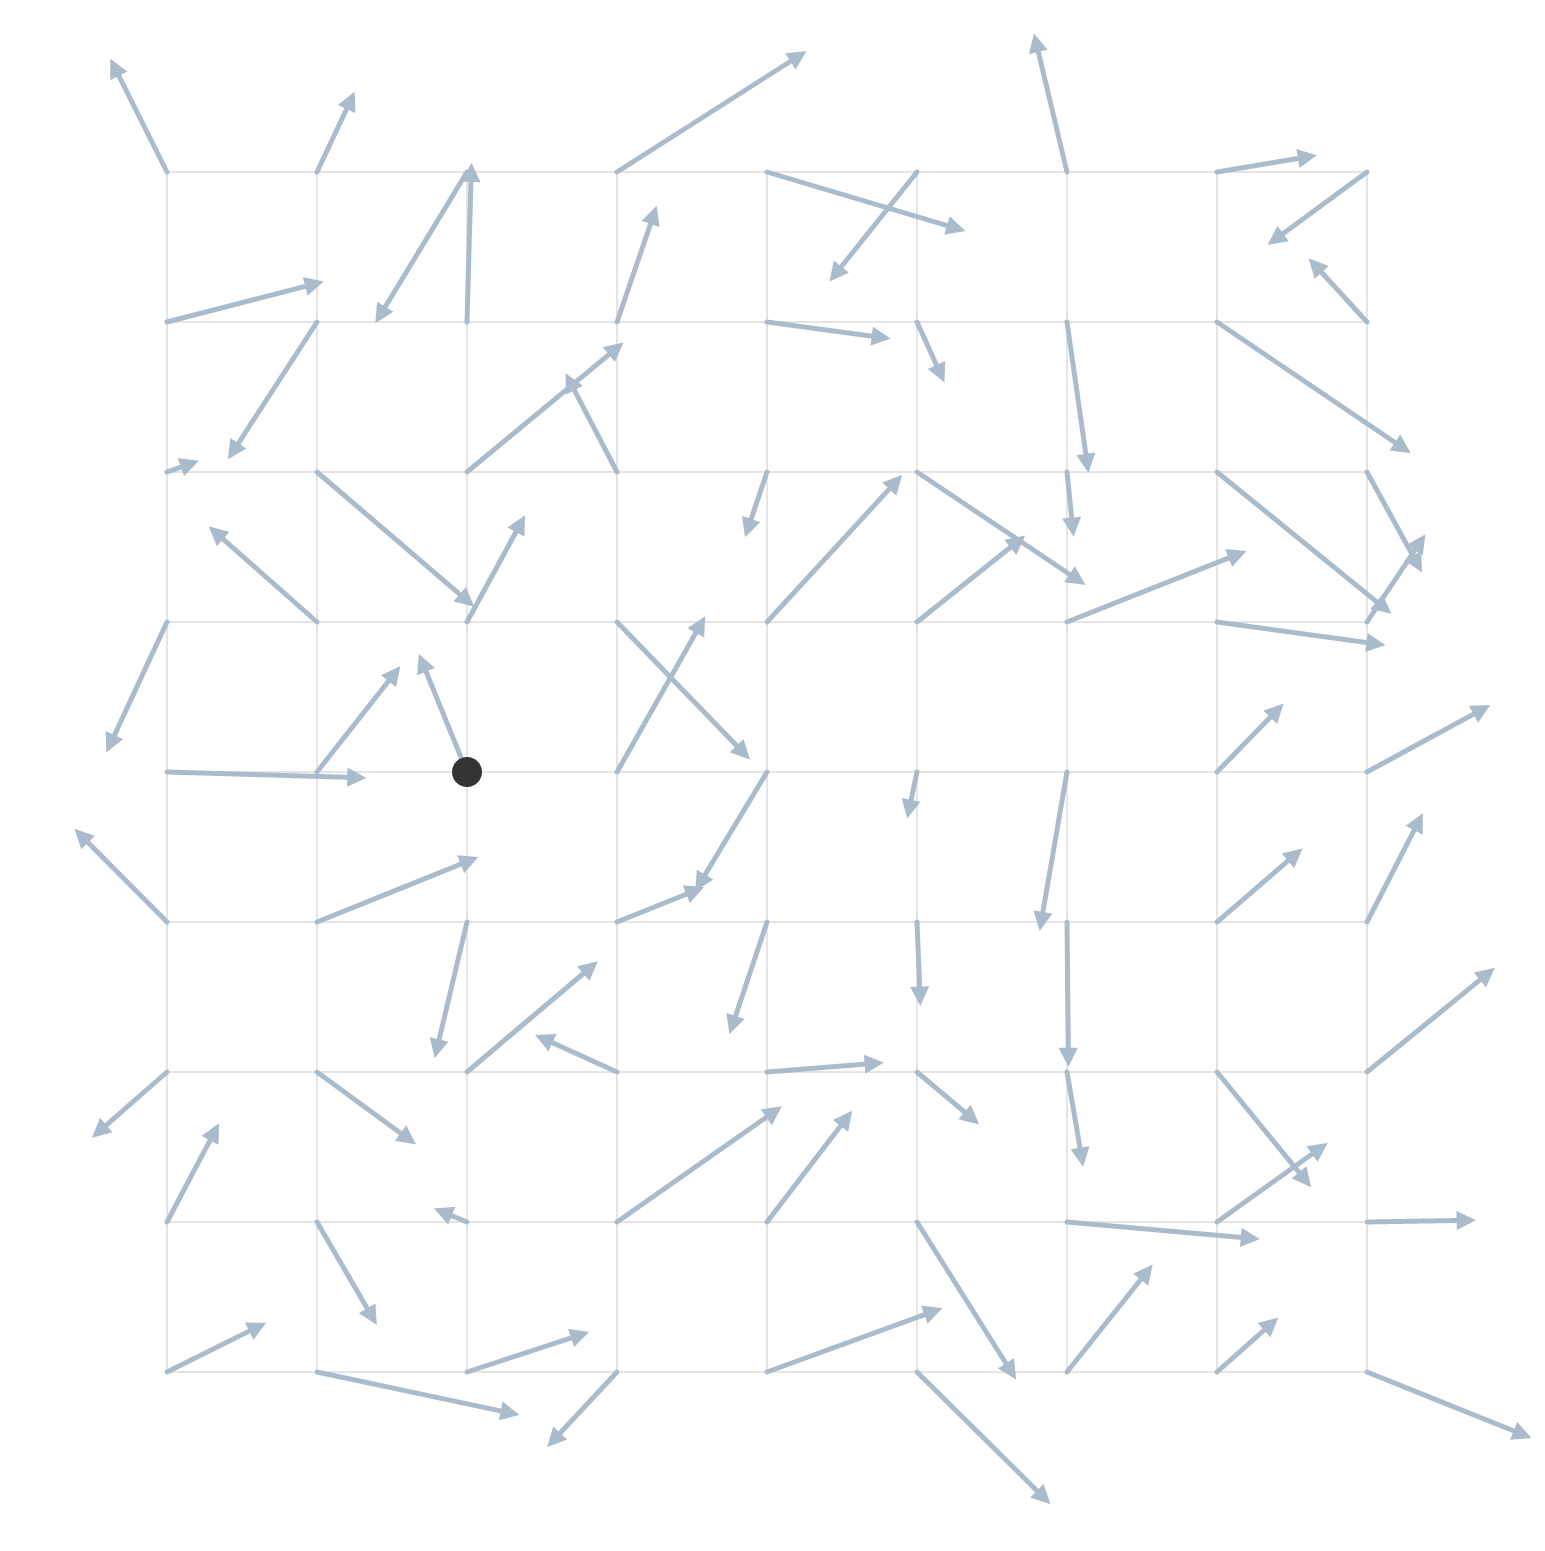
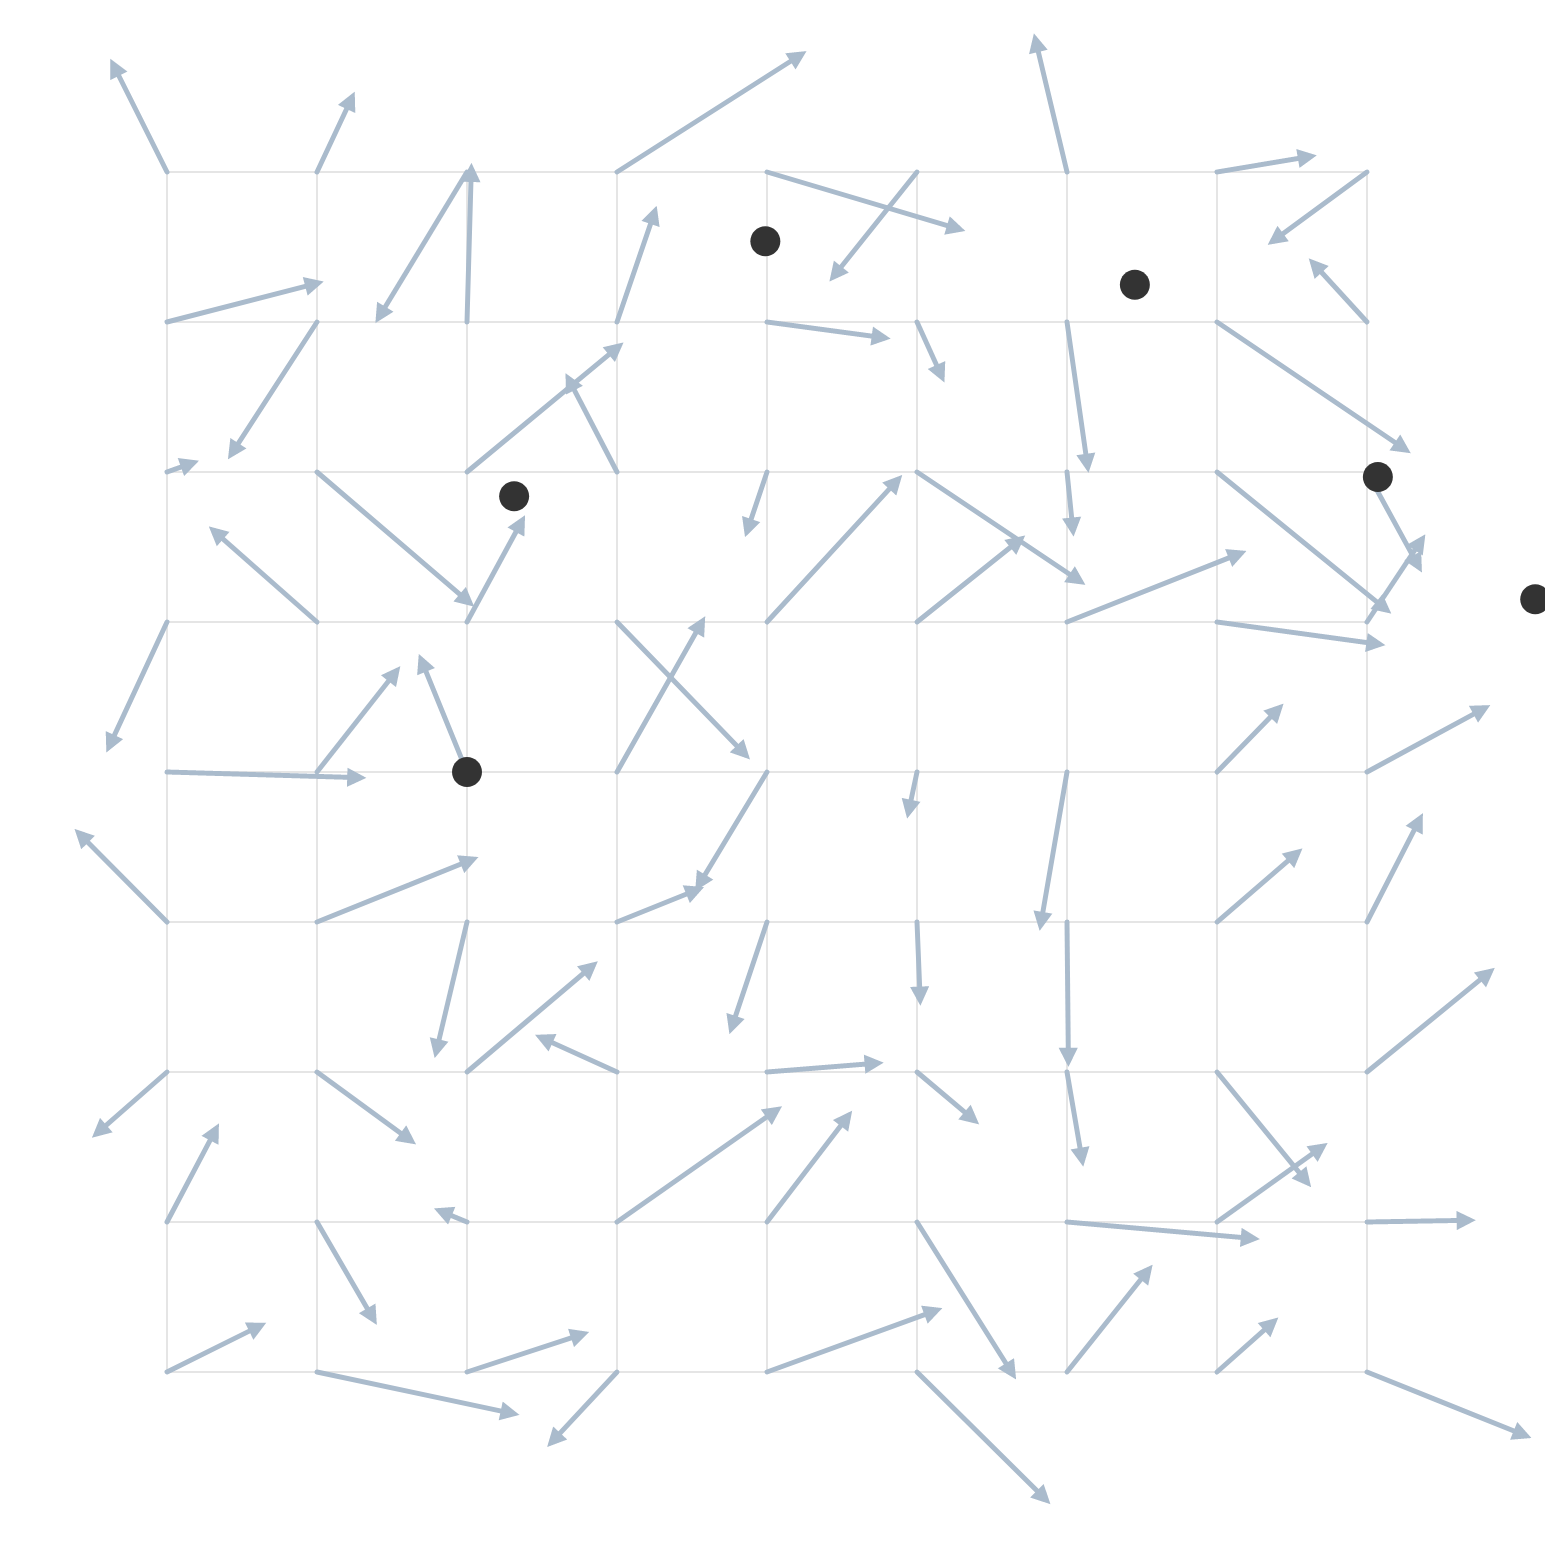
We need to define which vectors are applying "force" to our point. Let's use radial search radius of 1.5 times grid item size.
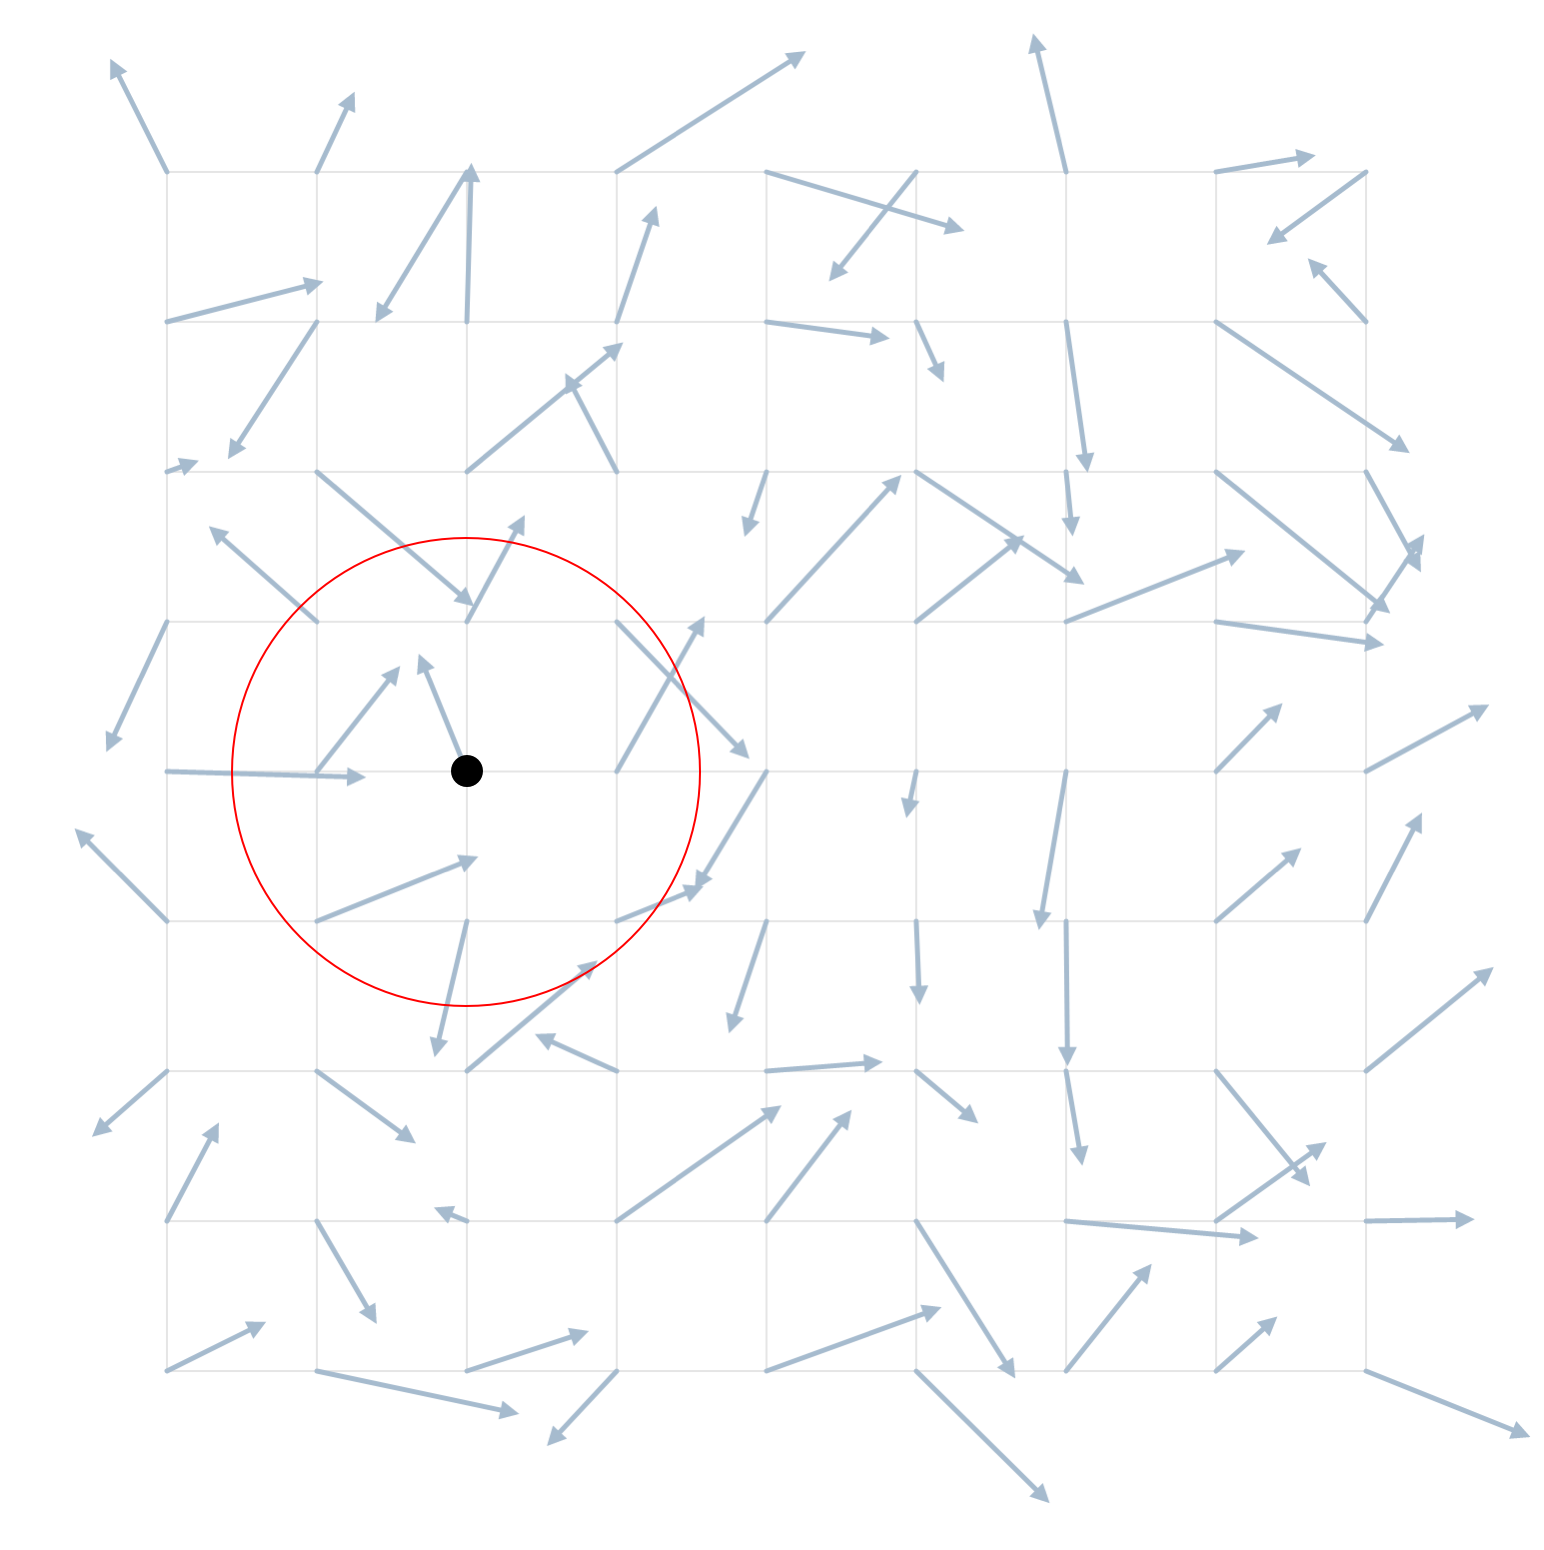
We'll select only vectors that start in this area (nine in this specific scenario).
For each one we will calculate a new force vector with the same direction, but with intensity reciprocal to its distance from the point. Meaning that the closer the vector is to the point, it will apply more force to it.
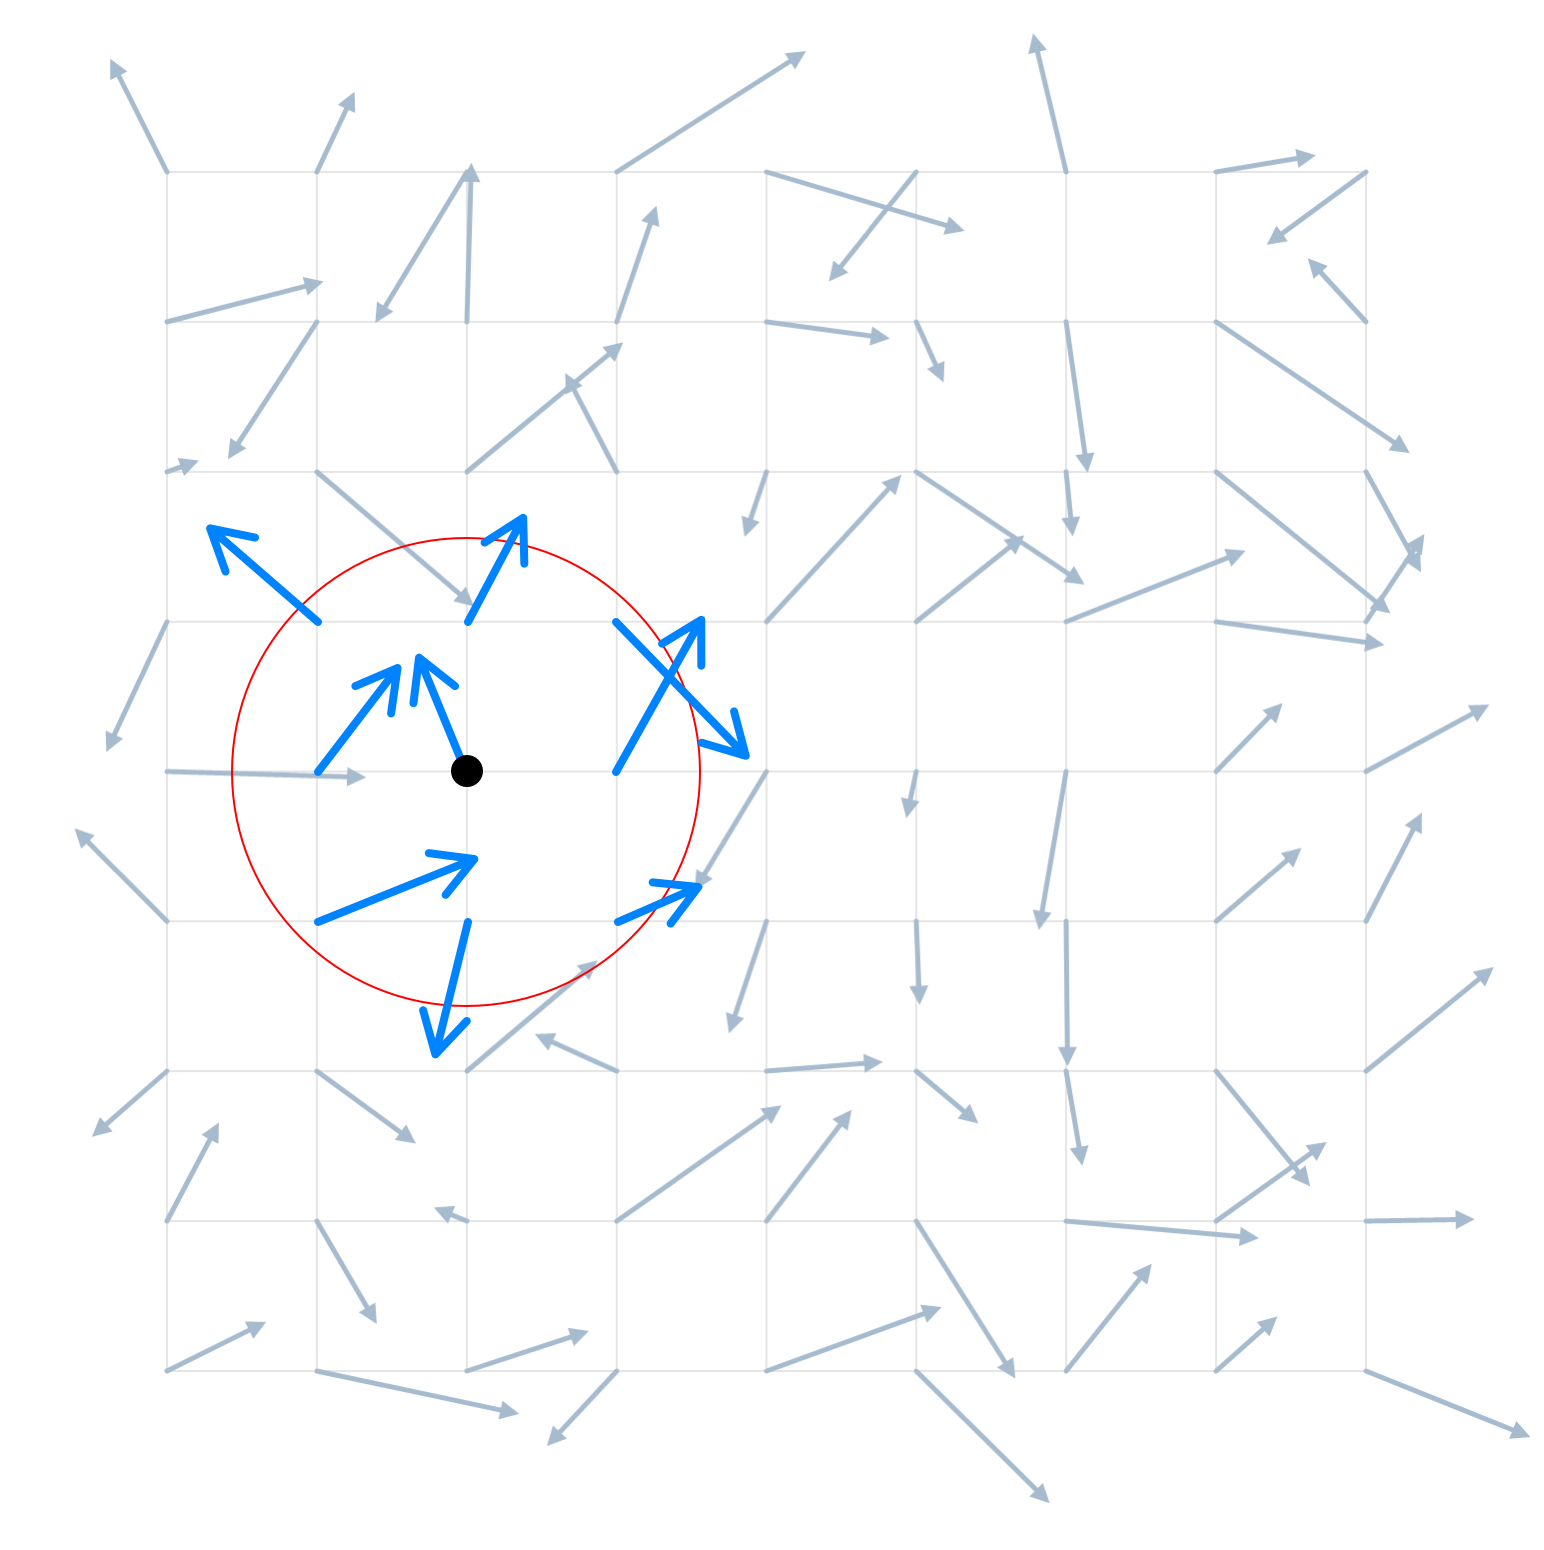
Adding up all of these newly calculated force vectors will give us a single vector pointing where our next point should be.
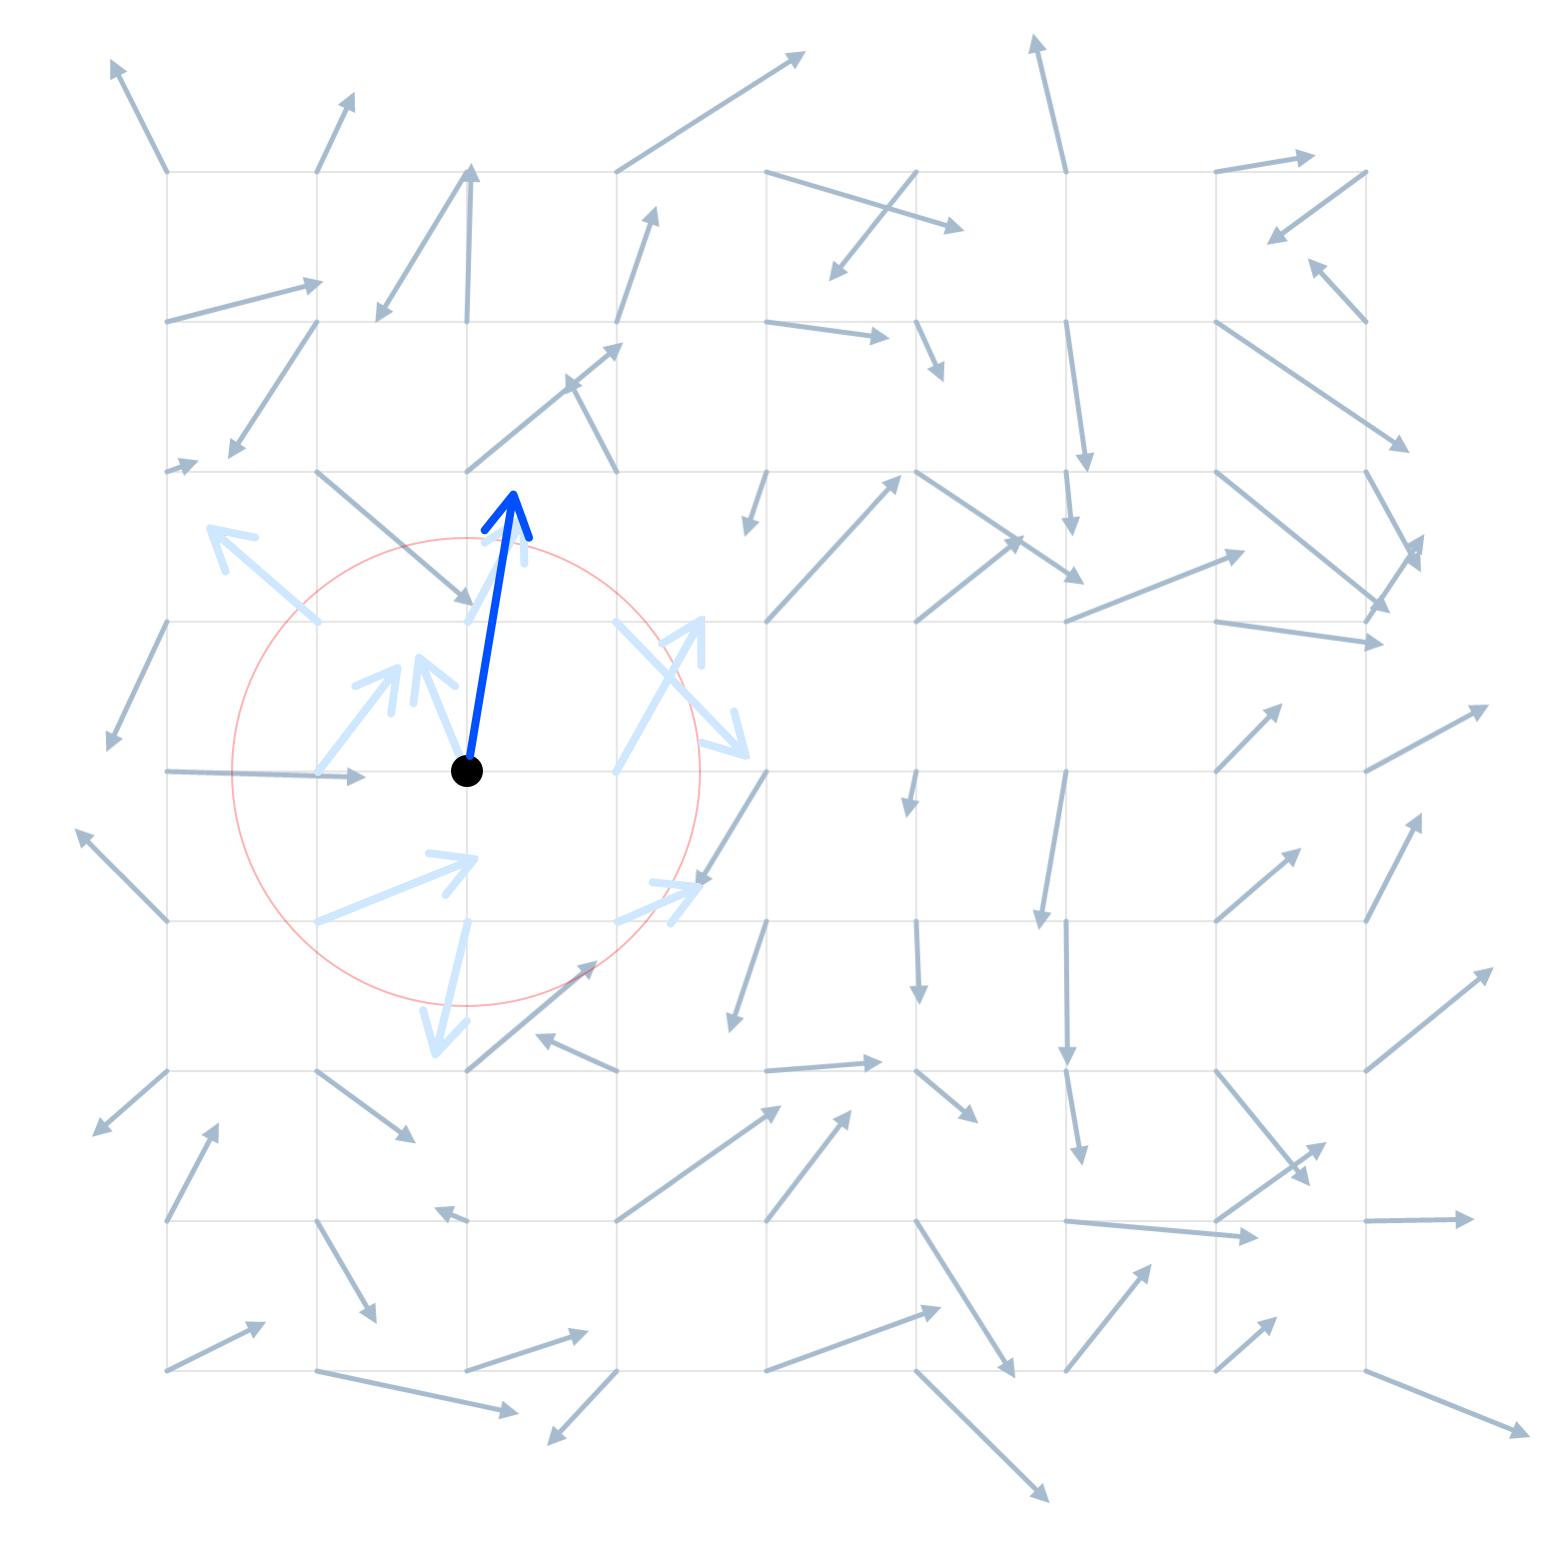
Let's draw the next point and apply the same steps to it.
Repeat the process recursively for each new point, until we are out of bounds or if we reach the limit of points we set (Neon uses maximum of 50 points).
Now we can draw a bezier curveI followed the great post by François Romain's on SVG path smoothing. through these points.
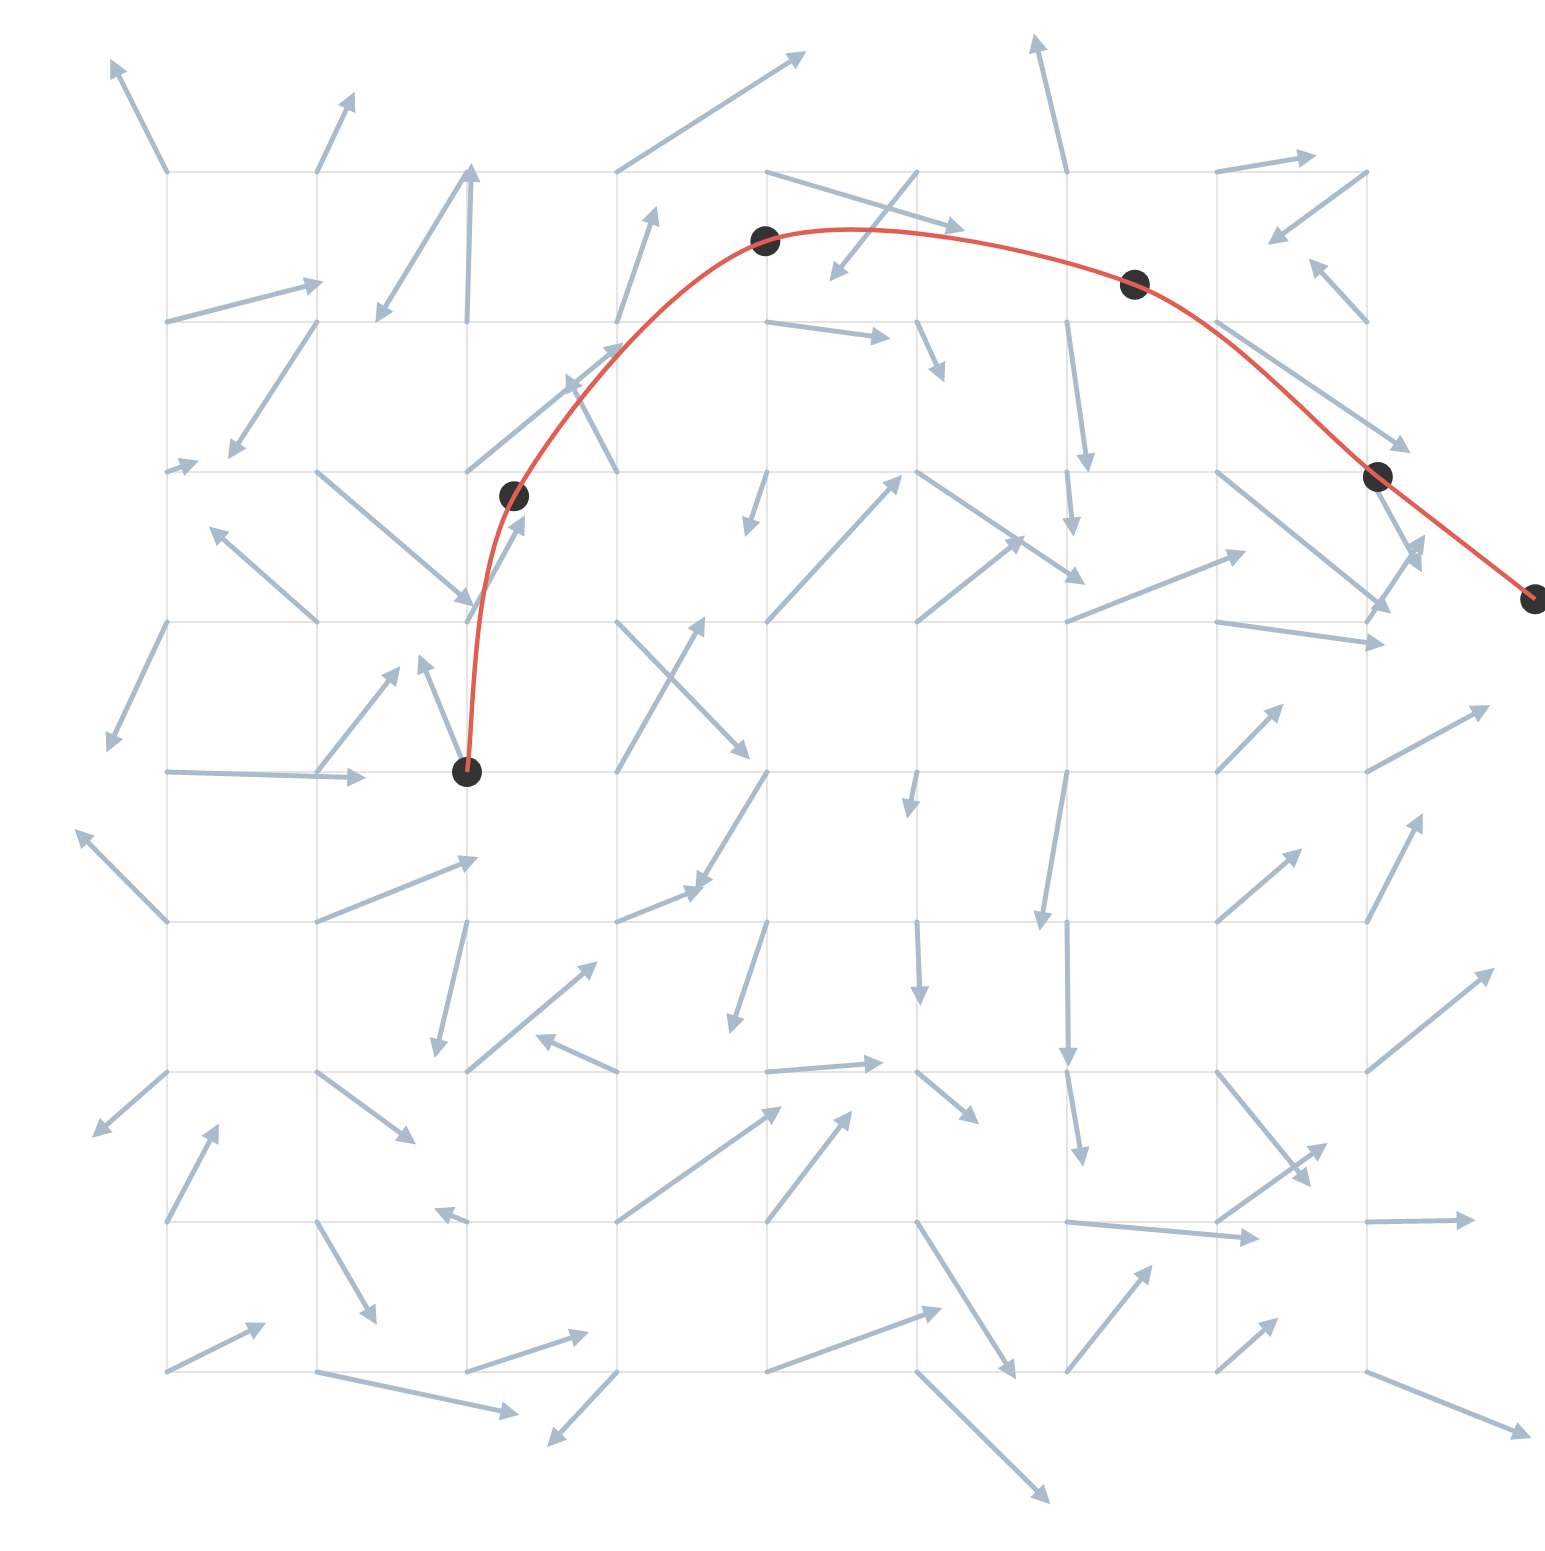
This process allows us to draw a line by only defining a starting point. We can draw as many lines as we want.
I created a live example for you to try it out:
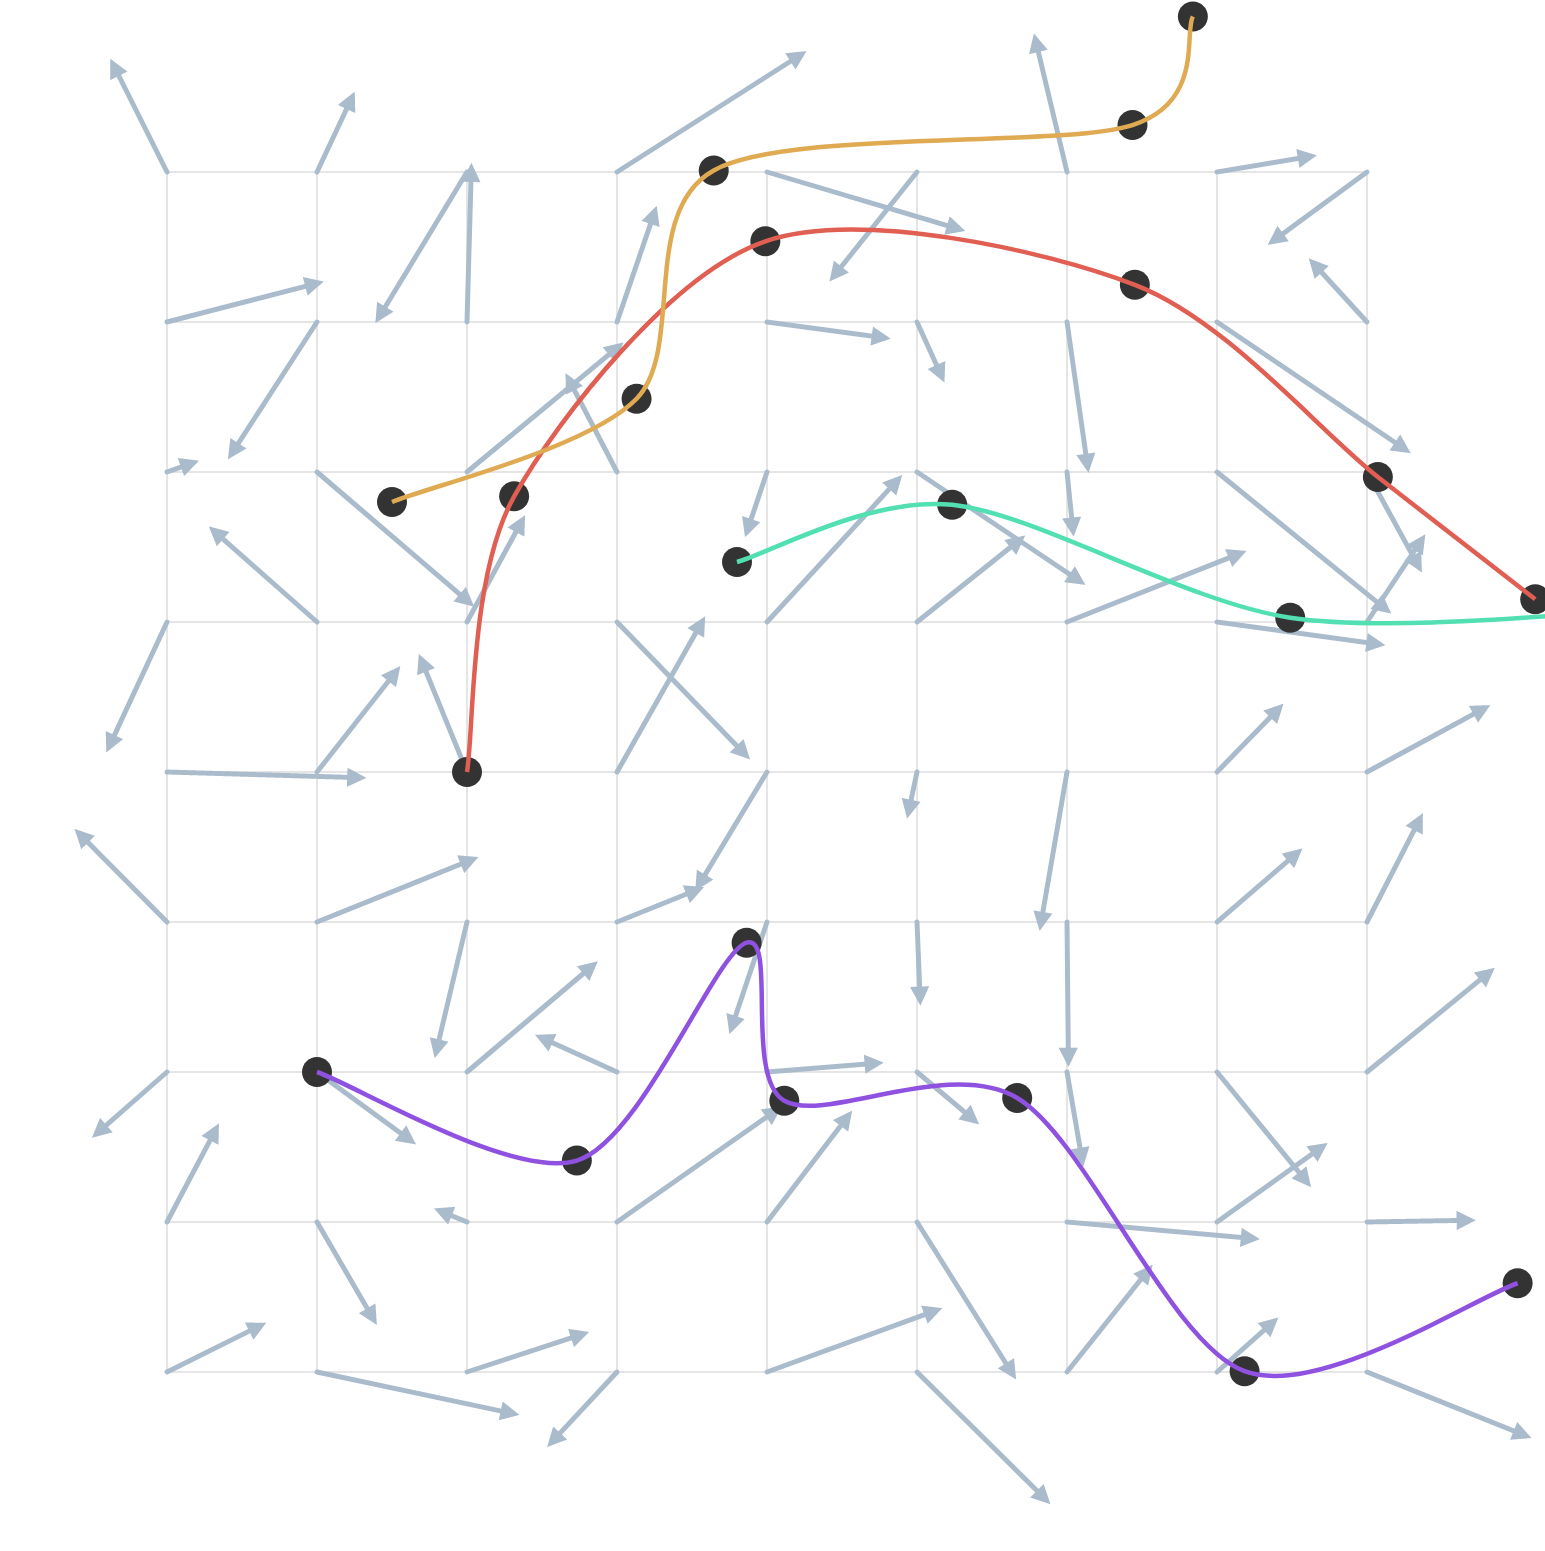
Neon vector field #
Heart of Neon is one of these vector fields. I started with completely randomly generated vectors. But I quickly realized that real randomness creates chaos. To get something visually pleasing, I had to put some constraints in. However, randomness is what gives these projects life and unpredictability.
Random vectors would often create a spiral of doom. Vectors would create a small black hole which would pull in any line that comes close.
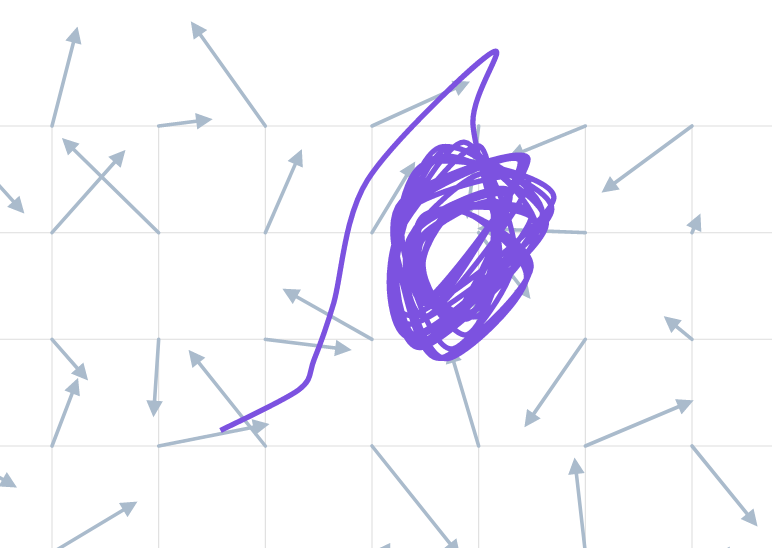
To avoid that, I used a very simple solution - to each random vector I added a constant vector that pulls to the rightThat is why most of the images have more weight on the right side. I love the resulting visual asymmetry. . That reduced black holes to a minimum. You can still see them here and there, but the occurrences are rare.
Lines #
Lines are generated in the exact way I described above. Starting points are randomly selected, along with line's width and color.
All random values are created using a seeded random number generator. That means generator will output the same random numbers sequence if we input the same seed.
This makes it easy to replicate images based on input parameters. Some parameters are exposed to the user through UI controls. Others are hidden on purpose, as I spent a lot of time fine tuning them to get the right "feel" out of the images produced.
Colors #
For color generation, I'm using HSL representation. It gives me an easy way of getting bright neonIf it wasn't obvious enough where the name comes from. colors. Saturation and lightness are fixed to 70% and 60% respectively, while hue is randomly selected.
// I'm passing pre-seeded random number generator
// You can use Math.random instead

export function generateRandomColor(rng) {
  const h = rng() * 360;

  return `hsl(${ h }, 70%, 60%)`;
}
Output #
Neon produces vector images, mainly because it enables printing large format without quality loss. Beside that I enjoy working with SVGs and I want to try pen plotting in the future.
Controls #
Initial version did only square images. Friend of mine really liked it and wants to print some out for his living room, but asked me if Neon could do different aspect ratios. He is the main reason I went back, added and polished UI controls.
Unique URLs #
Like I mentioned earlier, each image can be reproduced if we have parameters used. And playing with controls made it so easy to loose that one perfect image. That's why I added all of the parameters to the URL. Every URL is unique, and you can easily share image with anyone.
Logo and links #
It is a minor detail, but it is dear one to me. On every change, logo and links change color using the same color function used for line color.
Please share your creations #
If you end up using it in a project, printing it out, or just think you created a piece of art, please share it with me. I would love to see it. You can post a comment here, or open an issue on GitHub.
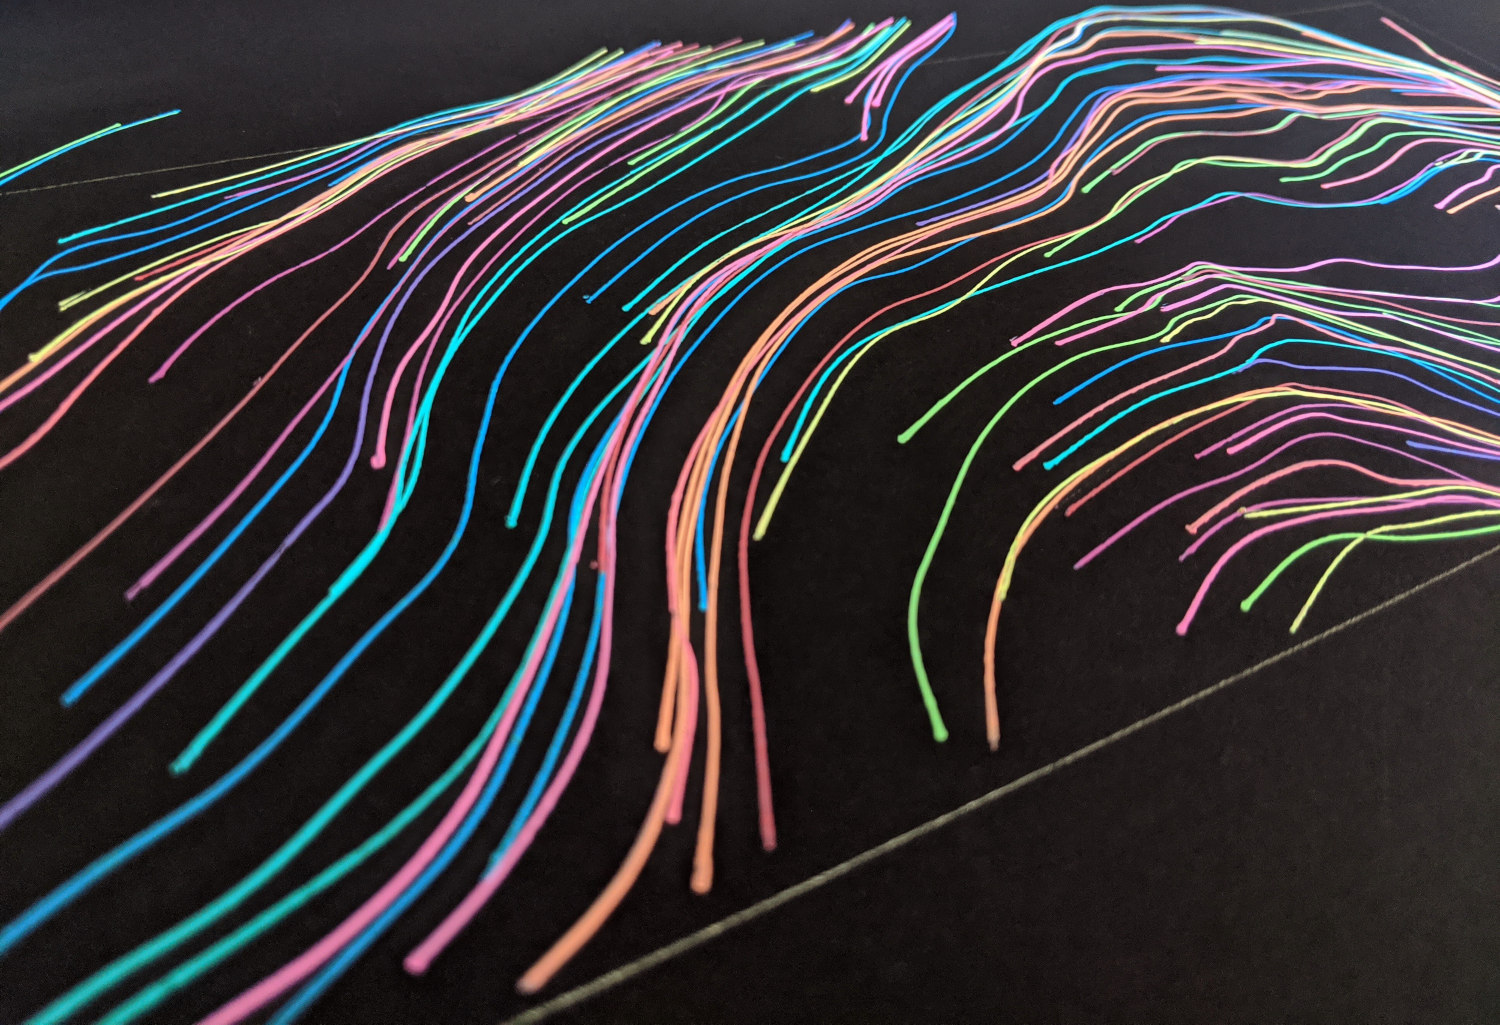
Plotted version #
Update, August 2020All of my art is made with pen plotting in mind. Few days ago, I finally got my hands on some gel pens (Sakura's Gelly Roll Moonlight) and the first thing I plotted was my favorite Neon piece:
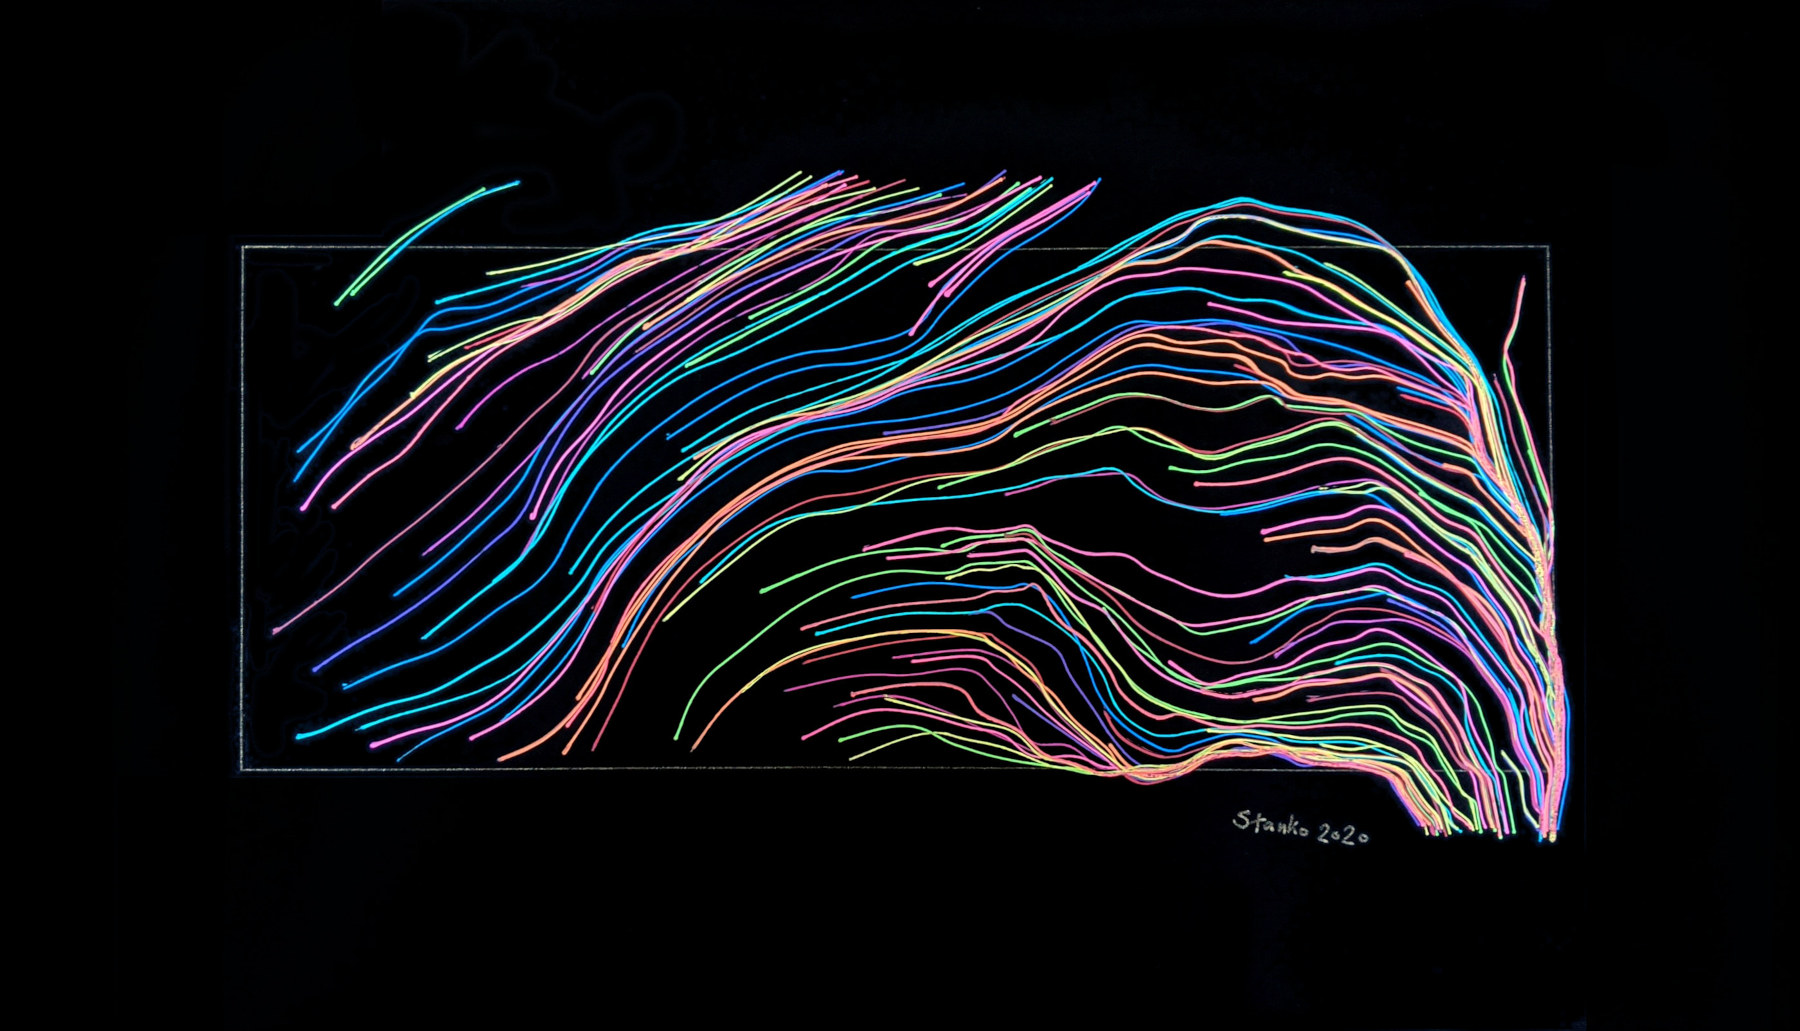
It is really hard to take a good photo of it, as in person, colors are much more bright and vivid. On the photo below colors are more accurate, but still not quite as nice as in real life.
If you want to see more of my generative art, check the art section on this website.
Comments (2)